Up until now, the strut that connects the thruster pod to the hull has been a bit clunky. It was a rectangular piece of G10 (a type of high-quality fiberglass laminate) with a floppy fiberglass fairing loosely wrapped around it. So I'm replacing that with two thin, streamlined carbon fiber struts in tandem. A previous post showed how I made the plug for the struts and the rudder. Now I'm going to make molds off those plugs.
First I took the plugs and surrounded them with material to put the mold parting line at the right place. Notice also the little clear plastic stick-on drawer bumpers. They will make perfect keying features in the molds.
First I took the plugs and surrounded them with material to put the mold parting line at the right place. Notice also the little clear plastic stick-on drawer bumpers. They will make perfect keying features in the molds.
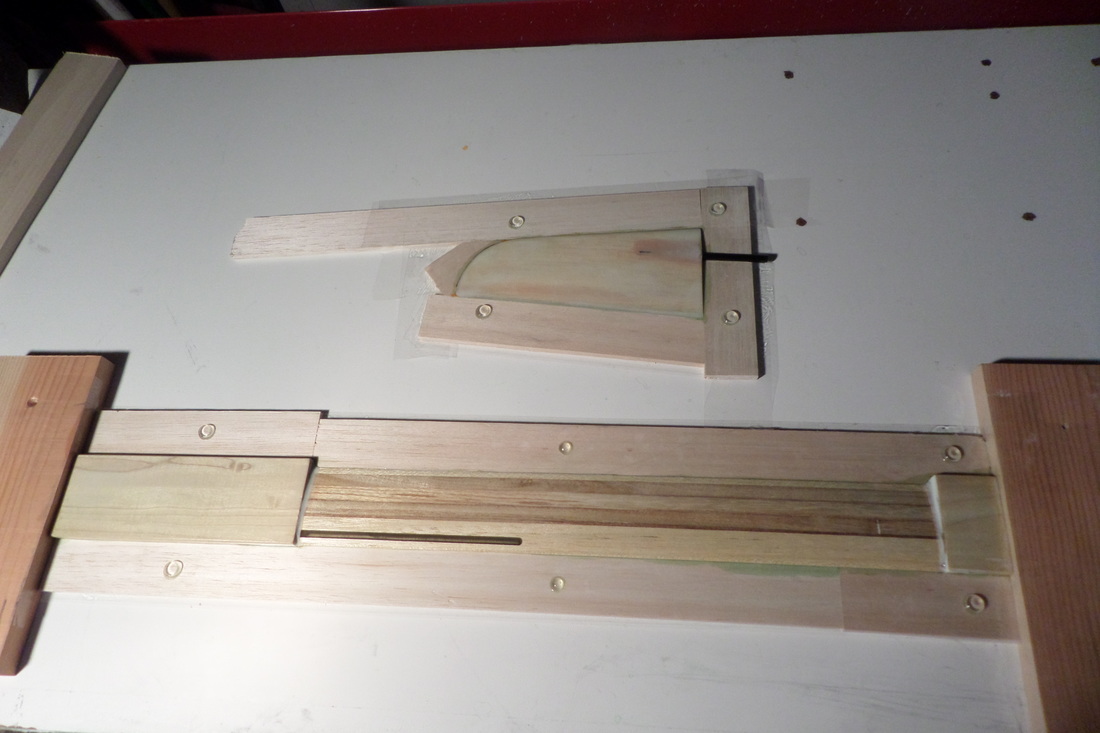
Getting ready to lay up the rudder and strut molds.
The molds were then laid up over the plugs, starting with a layer of thickened epoxy as a gel-coat and then several layers of fiberglass, then bonded to a sheet of wood to stiffen.
With the molds ready, I had to decide how much carbon I was going to squeeze into the molds. I aimed to fill the airfoil section of the struts 80% full with carbon. In other words, I calculated the cross-sectional area of the airfoil section, multiplied by 0.8, then divided by the thickness of the carbon fiber to get the total width of carbon fiber. Then I did a test-fit of that much carbon fiber to see if I could get it all into the mold. Well, surprise surprise, no luck. I ended up getting only 60% or so in there.
I wetted out the carbon with epoxy, cut it into strips of various widths, and laid half of them in one mold half and half in the other. The first layer was actually a layer of bidirectional carbon cloth, but then everything else was unidirectional.
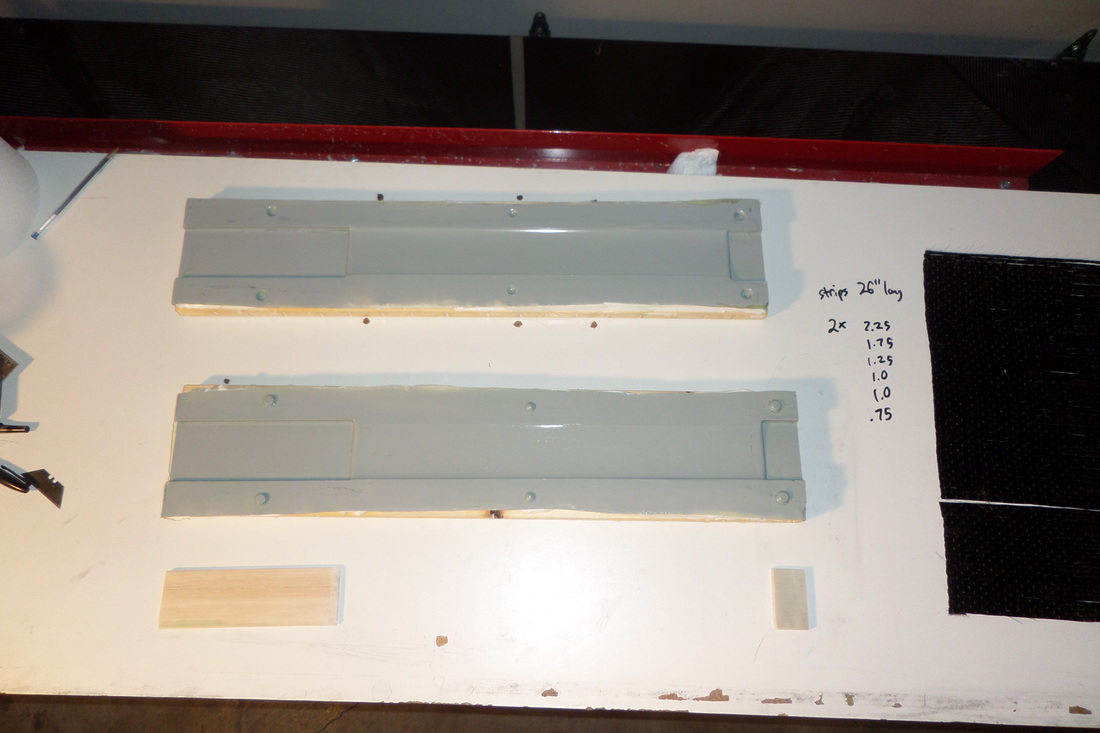
Strut molds (center top), balsa and G10 inserts to take up volume (center bottom), and unidirectional carbon (right).
And here's the finished result. When I make composite parts, it usually takes at least two or three tries to get a useable part. But this time I nailed it. Looks really nice, although it still has quite a few voids on the surface. Next time I'll brush some raw epoxy on the surface of the mold before laying in the carbon.
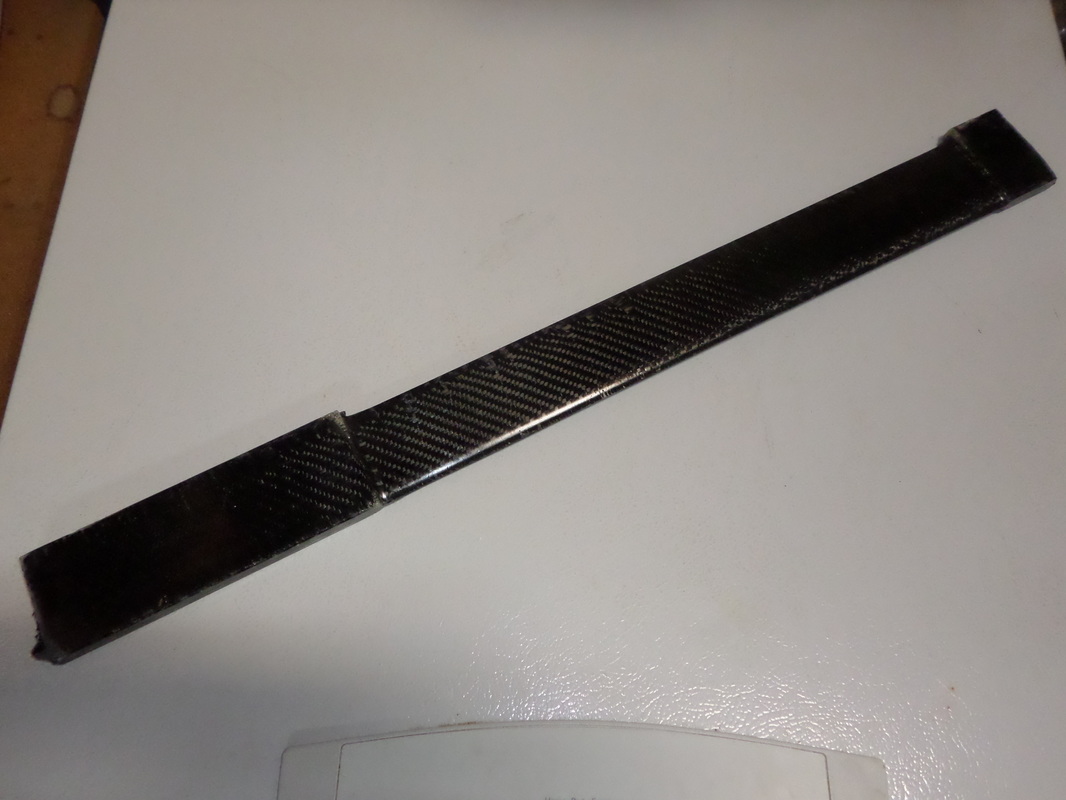
Brand new carbon fiber strut!
The plan is that one of the struts will have wires going down it (power and signal wires to the thruster pod) and one won't. This is the strut that doesn't. When I make the next one I'll implant a cable in it. That'll be interesting.
 RSS Feed